The Cheese Bar London: Making the world a cheddar place one dish at a time. Last Friday, I headed up to Camden Market to get my BRIEyonce on and stuff myself full of cheese.
The Cheese Bar, Camden Market


A food and travel blog by Phoebe Ashley
The Cheese Bar London: Making the world a cheddar place one dish at a time. Last Friday, I headed up to Camden Market to get my BRIEyonce on and stuff myself full of cheese.

A recent discovery sailed right into the top spot for me and since visiting I have become slightly obsessed. (Booking brunch before even finishing dinner sort of obsessed.) Continue reading “Darcie & May Green, Paddington”

From beautiful beaches to sobering mountains and wild landscapes, together Islay and Jura provide a truly memorable Scottish Isle experience. Continue reading “The Ultimate guide to Islay and Jura’s whisky distilleries”


As an island nation, it is unsurprising that in New Zealand – similar to in the UK – fish and chips can be found in abundance. Continue reading “The Mt. Vic Chippery, Wellington”

We’ve all been there; you buy a fresh bunch of bananas with all the best intentions, turn your back for five minutes only to find them looking a little sorry for themselves.
Instead of looking on such a sad state of affairs with an air or dismay, instead I see this all too common kitchen occurrence as an opportunity to get creative. This is how this recipe for my white chocolate salted caramel muffins was born:
Makes 12
Preparation time: 10-15 minutes
Cooking time: 20-25 minutes

INGREDIENTS
For the cupcakes:
3 ripe bananas
85g butter
2 eggs
120g light brown sugar
1tsp Nutmeg
1tsp Cinnamon
1tsp Vanilla bean paste
Bicarbonate of soda
260g Self raising flour
70g white chocolate – chopped up
For the caramelised bananas
2 ripe bananas – sliced
Icing sugar to coat
For the salted caramel sauce
75g butter
200g Light brown sugar
300ml Double cream
METHOD
Begin by preheating your oven to 160°C.
Start by mashing your bananas until pulped. To this add your butter and sugar and using either a manual or electric whisk and cream together until light and fluffy. Next add your eggs individually, ensuring they are well combined before adding the next. Then whisk through your vanilla bean paste. Regular vanilla essence will also work just as well.
Once all the eggs have been added, sift in your flour, bicarbonate of soda, nutmeg and cinnamon and fold into the banana mix. Finally stir through your white chocolate chips. Once you are happy that the batter is smooth, evenly divide the cake mixture between 12 cupcake cases. When each have been filled, gently tap the cupcake tray on a hard surface to knock the air our – this will ensure an even rise.
Place your cakes on the middle shelf of your cooker and bake for around 25 minutes, or until a skewer comes out clean. Once baked, remove and let cool on a wire rack.
To caramelise the sliced bananas, simply place some icing sugar in a bowl and coat each banana slice. Placing these onto a baking tray, simply bake at 160°C for around 10 minutes or until they are bubbling. Before they cool completely place them on top of your cakes – be careful as they will be hot, but if you wait for them to cool they will become stuck to the baking tray.
Finally to make the salted caramel sauce, simply melt your butter and sugar in a heavy bottomed saucepan. Once all the sugar has dissolved, let the mixture bubble for a few minutes before slowly adding your cream. When adding your cream, be sure to mix continually so not to solidify or cause the sugar to crystallize. Once in, let the caramel simmer for a further five minutes, add a generous pinch of salt and let cool.
Once everything has cooled slightly, simply pour the caramel into a serving jug, pour over the cupcakes and your away! Banana heaven!
And voila, over ripened banana crisis averted!

Having been set up by two native Southern Italians last summer, Bath’s newest pizzeria promises to deliver a truly authentic slice. More than this, Dough’s mission is to challenge common pizza conceptions; whilst there are numerous debates over toppings, how often do you find yourself questioning the base of your pizza?
And that is exactly what you will find yourself doing as soon as you’ve sat down at Dough. Expressing their aim through the catchy phrase; It’s all about the base, it is unsurprising that as soon as you open your menu you are faced with no less than seven different pizza doughs to choose from.
These doughs range from a simple multigrain base, right through a Turmeric infused dough and even a ‘Grano Arso’ or ‘burnt grain.’ Although rather crude sounding, the latter actually has origins stemming from rural poverty that was rife in 19th century Italy where the peasants – too poor to afford flour – used to sweep up and use the grains burnt from the harvesting machines.
Dough’s waiting team we’re polite helpful and incredible knowledgeable. Ours was all to keen to offer insight and guidance to which pizza to pair with which dough and with as much adeptness as your high-end someiller!
To view Dough’s menu in full, please click here: http://doughpizzarestaurant.co.uk/menu/
The overall effect of Emiliano Tunno and Massimo Nucaro’s brainchild is excitement. As soon as you walk into Dough you are instantaneously delighted. Welcomed by the almost theatrical nature of the open kitchen, the light, simple and smart decor that comes equipped with subtle nods towards its Italian parentage via cool monochromatic photographs offers a point of direct refreshment to Bath’s quintessentially Georgian surroundings. Especially being sandwiched between the famous Corridor in Bath and the historic Northumberland Place.
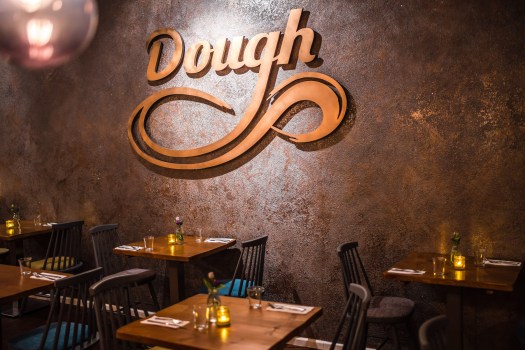
The restaurant itself is spacious without feeling too intimate. Bare bulb pendant light fittings, simple wooden tables, exposed piping, an open pizza kitchen and a metallic-charcoal wall that is emblazoned with a large brass ‘Dough,’ all combine to create a clever atmosphere that is an astute crossover of authentic rustic Italian and modern cosmopolitan eating.
Emiliano comfortably takes centre stage in the kitchen and there is no missing him; he’s the one twirling and spinning pizza dough in mesmerising shapes several feet above himself in the open kitchen! And that seems a perfect metaphor for Dough which, for me, is marking a brave new spin on one of the world’s favourite dishes.

When my ‘Smokey’ pizza arrived – tomato sauce, mozzarella, speck (smoked prosciutto), smoked mozzarella and rosemary – it looked quite simply perfect.

The sparing use of ingredients let the rich tomato sauce sing through under delicately sliced and appetisingly pinked speck – not done any justice in my above photo! Just as well as Massimo takes great pride and time in selecting all of Dough’s produce – the most of which comes straight from the pairs’ hometowns in Southern Italy.
The overall flavour was one of oak, earth and fire. The Rosemary served as a clever fresh twist at the end. The Grano Arso base which was grey in appearance really heightened the whole experience. Crisp, bubbly and slightly chewy it was all you want from a base. Its taste was subtly bitter which made it the perfect vehicle for the toppings.
I can, in all honesty, say – bar my recent trip to Venice – that it was one of the best pizzas I’ve had in a while! It was light and scant of any overwhelming oily or greasy nature. Afterwards, you didn’t feel stodgy or over indulged, you felt satisfied and content.
I thoroughly enjoyed my trip to Dough and taste of Emiliano Tunno and Massimo Nucaro’s one of a kind pizzas. They really are true pioneers who are carving themselves out their very own niche in the world of pizza – a world which up until very recently I believed to be crowded, saturated and overdone. Its so wonderfully refreshing to see Dough thinking and cooking in new and exciting ways.
My one suggestion – Dough, if you’re reading this – would be to introduce a starter where you can sample all the doughs before you order; perhaps a ‘Dough’s ball dish‘ with a garlic dipping sauce.
Having said that, without such, I’ll defiantly be returning at least six times to try the rest!


My love for baking started as most of them do – standing on a stool next to my mother in the kitchen. It has to be said probably often more interfering with sticky little fingers rather than helping at all. However, it was during this fortnightly ritual that somewhere along the lines I fell in love – lock, stock and barrel – with that emotive combination of butter, sugar, eggs and flour!
Since these early days, this love of cake – the eating or baking off (I’m not fussy) – has only grown and over the past couple of years I really have honed my skills. It was this honing that actually inspired the creation of this blog and my Instagram account (@alittletasty). I wanted space where I could document my creations and experimenting.
Since starting both of these, I am lucky enough to be in the position that I have started selling my cakes and bakes. Consequently, it only seems right that I should do a how-to blog post on how you too can create your own show stopping cake – I promise they are easier than they look! You just need a few tips and tricks to make a cake look impressive.
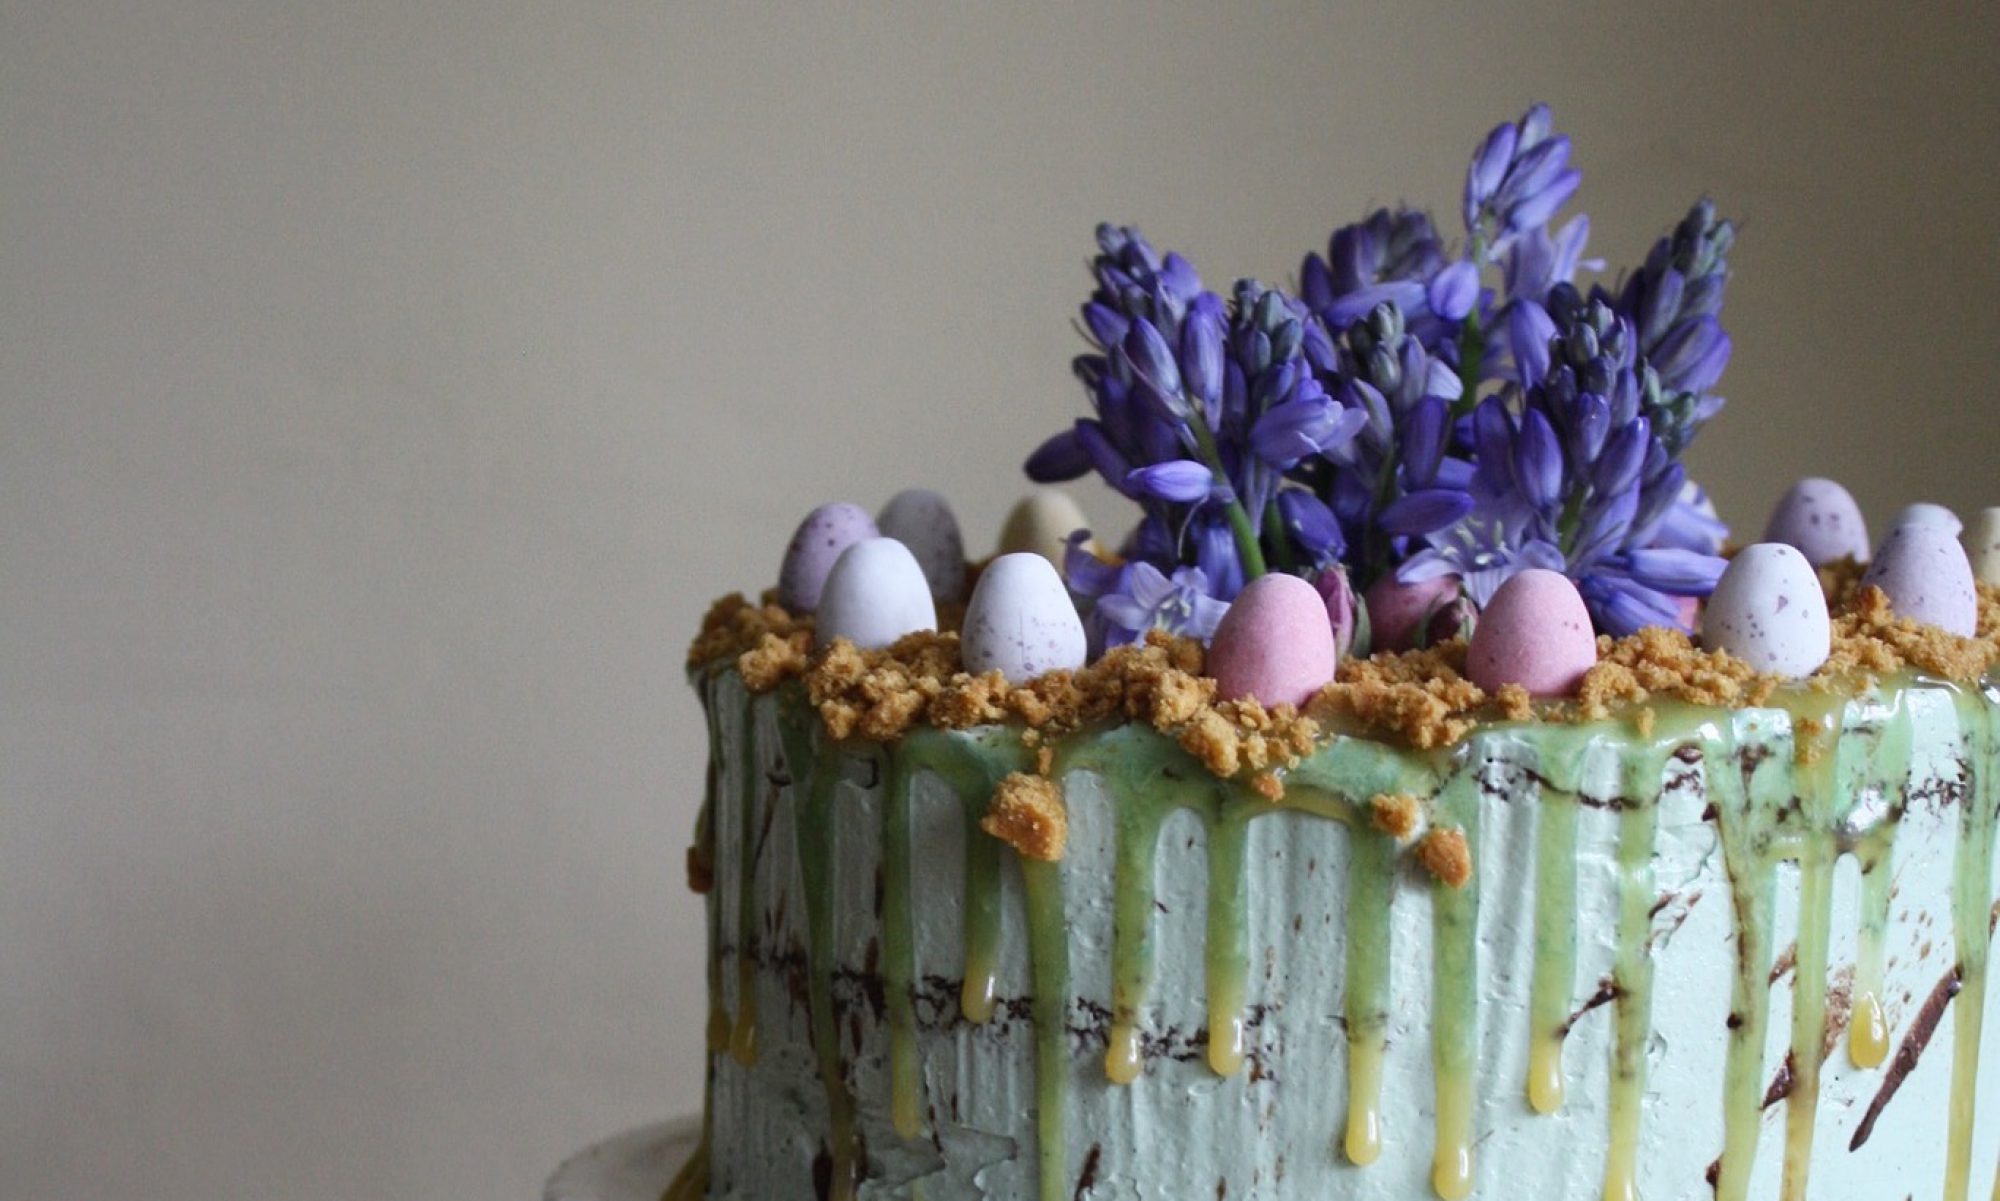
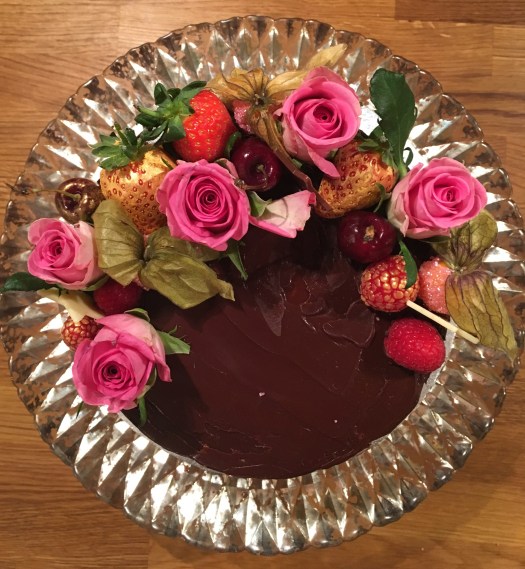
And so, in what follows is a complete – all secrets exposed – step by step guide to recreating one of my signature bakes: A vanilla sponge cake with a chocolate and raspberry buttercream and a raspberry sauce centre, finished with a chocolate ganache flowers a fruit. Perfect for all occasions!
Please note the following recipe is divided into the cake recipe, the icing recipe, the raspberry sauce recipe, the ganache and finally instructions to assemble!
If you want to have a browse of my other cakes, head on over to ‘My Cakes’ page, or follow me on the Insta 😉
Makes enough to serve 15 happily.
Warning: This is a time-consuming recipe and I normally complete it over two evenings.
INGREDIENTS
325g Self-Raising Flour
325g Butter (plus extra for greasing)
325g Light Brown Sugar
6 Eggs
2 tbsp of Vanilla Bean Paste
1 tsp of Coffee Dissolved in 75ml of Warm Water
1 tbsp of Plain Yogurt
1 Pinch of Salt.
METHOD
Begin by greasing three 20cm cake tins and pre heating your oven to 180°C. If you don’t have 3 cake tins, grease two and you can always reuse one!
Firstly beat the butter and sugar together until light, fluffy and smooth in appearance using an electric whisk. For this recipe, I use light brown sugar as I think it gives the cake a richer and more caramelly flavour.

Once combined, add the eggs one at a time and whisking on a high speed after each addition. After you’ve added the last egg, add in one tbsp of flour – this will stop the batter from curdling.

Next, sieve in the flour and salt and beat well. Once fully mixed together, add the yoghurt and vanilla bean paste. I know this paste is considerably more expensive than the extract, I promise you it will be worth it.
After all the ingredients have been combined and you are left with a smooth batter, spoon into the three greased cake tins. Each tin should have around 500g of batter.

Bake for about 25 minutes at 180°C – or until a knife comes out clean!
Remove from tins and let cool using a wire rack.
*Please note that this recipe is taken from The Hummingbird Bakery‘s ‘The Hummingbird’ Cookbook. I have slightly adapted it to suit this recipe by swapping out their addition of milk for 200g of raspberries. This gives the icing enough moisture to loosen it, whilst giving it a slightly sharp and refreshing zing!
INGREDIENTS
450g Icing Sugar
150g Butter – at room temperature
60g Cocoa powder
200g Raspberries
METHOD
Begin by beating your butter in a freestanding electric mixer on a fast speed for about five minutes – or until pale in colour. This is a very important step to making any buttercream frosting and will ensure the end result is both smooth and light in texture.
Next, combine your icing sugar and cocoa powder together loosely. Whilst the whisking all the time, add your one tablespoon of this mixture at a time. You may indeed have to use a spatula and scrape down the sides occasionally to ensure that all the butter is combined. Once it has all been added you should be left with a mixture whose texture resembles dry soil! Don’t panic – this is exactly what you are looking for!

Once this has been achieved, again on a high speed, gradually add in the raspberries. The balloon whisk fitting will break these down to ensure that they combine well. Once all added, leave your mixer whisking for a further minute.
INGREDIENTS
200g Raspberries
200ml Water
4 tbsp Caster Sugar
1 tsp Vanilla Extract
METHOD
In a heavy bottomed saucepan, combine all the ingredients and bring to the boil. once boiling, let the mixture simmer and reduce for a further 10 minutes or until it has thickened and easily coats the back of a spoon.
Remove this from the heat and pass through a sieve using a spatula to separate the jam and the pips. Let cool and voila!
INGREDIENTS
200g Good Quality Dark Chocolate
150ml Double Cream – chilled
1 tbsp Butter
METHOD
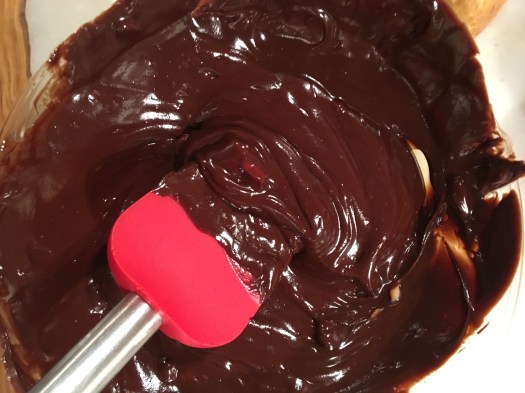
Melt your chocolate either using a bain-marie or in the microwave via 30-second intervals. Once melted add your cream and give the ganache a stir.

Next, add the butter to give it a lovely sheen. It should be thick and spreadable in texture.
Once the sponges have cooled, it is important to level your cakes. This ensures that your final cake will be straight. To do this, simply take a bread knife and carefully slice off the tops of your sponges where they dome.

Next, using a palette knife and spatula, sandwich the cakes together with a dollop of icing and drizzle of raspberry sauce.

Once sandwiched, ice the sides; take a spatula and again dollop all around the sides – especially in the joints of the layers. Then, using a palette knife vertically, go around the edges of the cake until smooth. You may need to add more icing in patches. Also, ice the top in a thin layer. As this is just the crumb coat it doesn’t have to be perfect! (For a tutorial on how to do this, watch this video from HowCast.)
After you are happy you have iced your cake and it’s a smooth and level as possible, place the cake in the fridge for a couple of hours – or overnight. This will allow your icing to firm up so that when you apply the ganache it won’t melt and enable you to get the best finish possible!
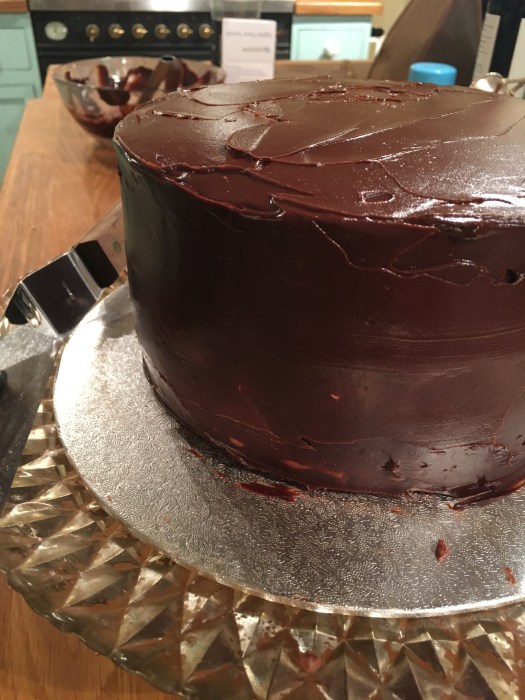
Add the ganache by pouring on the top and allowing to slide down the sides. When sliding, using your knife in the same way you did the icing, smooth the sides and top.
Before placing back in the fridge add your decorations. I think seasonal berries, some coloured gold using powdered gold food colouring, and flowers are the most effective. But get creative and use what you like.
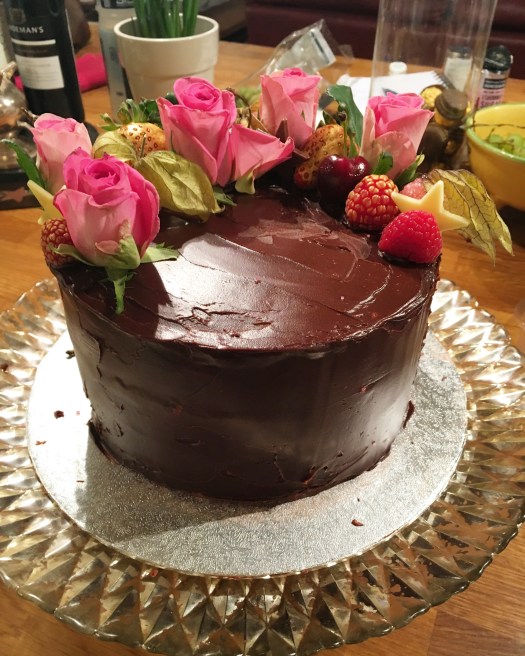
It is at this stage that you are able to truly create your own distinctive style, which in the very competitive world of cakes is crucial! It’s like art, you want people to spot one of your cakes a mile off!
So there you have it, your very own step-by-step guide on how to make your own showstopper layer cake. I’d love to see your interpretations of this recipe, tweet me your cakes at @alittletasty123 or tag me in them on Instagram @alittletasty
All there’s left to say is happy baking!

There’s a strange sort of magic that hangs over Combe Grove Manor. Winding your way down the lengthy drive under a leafy canopy, you cannot help but feel a strong sense of nostalgia, especially when greeted by a moss-shrouded arch that looks as if it’s wandered straight out of Perrault’s Sleeping Beauty.
