If you are after fine dining, authentic Pacific cuisine or a cheap but delicious place to eat, New Zealand’s adventure hub will step up to the challenge.
Top eats in Queenstown, New Zealand


A food and travel blog by Phoebe Ashley

Published by Crumbs Magazine, to view published version, click here.
‘Drizzle’ is a word not commonly associated with joy; reminiscent of grey, damp and generally miserable days. However, when immediately followed with the holy grail of words – cake – we then find ourselves faced with one very benevolent exception: A bright, syrupy and sticky citrous loaf – a very honorable exception indeed!
So, in what follows is my own take on the delightful teatime treat, the humble drizzle cake. This recipe also serves as a fine celebration of the blood orange, which, every January, seems to burst onto our shelves just in the nick of time. Restoring some promise of sunshine into our lives. Combine this with cardamom and pomegranate and your onto a winner. A perfect ode to the much loved and sorely missed (come late April) Blood Orange which is now sadly entering into the dusk of its seasonality.
INGREDIENTS
For the cake
200g of Butter – softened
200g of Self-Raising Flour
200g of Light Brown Muscovado Sugar
Zest and Juice of 1 Blood Orange
3 Eggs
6 Cardamom Pods – deseeded
2tbsp of Natural Yogurt
A Pinch of Salt
For the syrup
50g of Caster Sugar
Zest and Juice of 1 Blood Orange
3 Cardamom Pods – crushed
For the glaze
Juice of half and Pomegranate
250g Icing Sugar
METHOD
Begin by preheating your oven to 180°C and lining a loaf tin with baking paper or a liner.
Using an electric whisk, or a manual one, cream together the butter and sugar. For this recipe I like to use light brown Muscovado sugar as I think it works well with the blood orange and give a caramel twist to the cake. Caster sugar will also work though! Once creamed, add the eggs one by one whisking well after each addition.
After the eggs have been combines, sieve in the flour and salt and mix well. Following, grate in the zest and add the juice of the blood orange, add the seeds from the cardamom, the yogurt and whisk together.
Pour the mixture and place in the oven for around 45 minutes to bake, or until a skewer or knife comes out clean.
Whilst your loaf is baking, make the syrup. Simply, combine all the syrup ingredients in a heavy bottomed sauce pan. The sugar will melt and the juice will begin to bubble. Allow to simmer for around five minutes on a medium heat until the mixture has thickened and reduced by half. Set aside.
When your cake is ready, carefully remove from the tin once letting it sit for 5 minutes. You don’t want to let it cool fully as if it is allowed to do so the syrup will not seep right through. Once it is out of its tin, taking a skewer (or a chopstick, or knife) poke the cake all over – in rows of around 5 insertions. This is key as it will ensure the syrup goes right through the cake to leave you with the wet, sticky sponge you’re after!
Next, place the cake onto a chopping board or plate and pour the syrup over the top. Be very careful as your syrup will be hot! Now leave to cool.
To make the glaze, juice half a pomegranate and gradually add the icing sugar. It is important to slowly add the sugar to ensure your glaze is smooth.
Once your cake is cool, drizzle this mixture over the top allowing it to drip down the sides. Once the glaze has set slightly, very carefully transfer your drizzle cake to a preferred serving dish, or leave where it is and enjoy the run offs!
And voila! One sticky, gooey loaf of pure blood orange drizzle joy!

I, like most people, am a huge ramen fan; it’s simple make up, warming qualities and intense Asian flavours just tick all the right boxes for me. It really is no wonder that since it’s invention in the early 1900s, that it has become one of the world’s most popular dishes. Indeed, in Japan each region has its own distinctive ramen variations rangeing from Northern Japan’s iconic pork bone broth variety to the South’s miso ramen.
While I really do appreciate the time and effort that goes into creating a traditional ramen, sometimes I simply can’t wait more than twenty-four hours for my broth to intensify! As a resolution, I have put the following recipe together for a quick and very simple pork-belly and egg noodle mid-week ramen supper. (I apologise in advance for all the ramen rules I’m breaking, and if this recipe even qualifies as a ramen – but I made it for a few friends a few weeks ago and they weren’t complaining!)

INGREDIENTS
For the broth
2 tbsp Mirin
150 ml of Dark Soy Sauce
2 Garlic Cloves
1 thumb sized piece of Ginger
1 tbsp Muscovado Sugar
2 Litres of good quality Chicken Stock
4 Spring Onions
For the Ramen
750g Pork Belly
1 tsp Crushed Chilli Flakes
4 Eggs
250g Egg Noodles
A small handful of Coriander
METHOD
Begin by slicing the pork belly into quarters and bake in the oven at 180°C on a baking tray with a drizzle of soy sauce and sprinkling of crushed chilli flakes. This will need baking for about 30 minutes or until fully cooked through.
To make the broth, heat the mirin and soy sauce in wok and slowly bring to the boil. Once boiling grate in the ginger, add the garlic finely sliced and stir in the muscovado sugar so that it all dissolves. Leave the mixture simmering for a further 5 minutes. Next add the chicken stock and spring onions, finely sliced, and leave simmering.
While your broth is simmering away, place a large saucepan of water over some heat until boiling, to this pan add both your noodles and eggs. Remove both after four minutes exactly and place in a waiting bowl of cold water. Leave to cool. Once cooled, carefully peel your now soft-boiled eggs.
Taking four deep-dished bowls, evenly divide up the noodles between each. To this add an even amount of pork belly. Next top your bowl up with the broth, slice the eggs in half and float in the broth. Finish with a sprinkling of coriander, a drizzle of soy sauce and extra chilli flakes if you want to spice things up.
There you have it, my super easy but super tasty Ramen – and done in a flash!


My love for baking started as most of them do – standing on a stool next to my mother in the kitchen. It has to be said probably often more interfering with sticky little fingers rather than helping at all. However, it was during this fortnightly ritual that somewhere along the lines I fell in love – lock, stock and barrel – with that emotive combination of butter, sugar, eggs and flour!
Since these early days, this love of cake – the eating or baking off (I’m not fussy) – has only grown and over the past couple of years I really have honed my skills. It was this honing that actually inspired the creation of this blog and my Instagram account (@alittletasty). I wanted space where I could document my creations and experimenting.
Since starting both of these, I am lucky enough to be in the position that I have started selling my cakes and bakes. Consequently, it only seems right that I should do a how-to blog post on how you too can create your own show stopping cake – I promise they are easier than they look! You just need a few tips and tricks to make a cake look impressive.
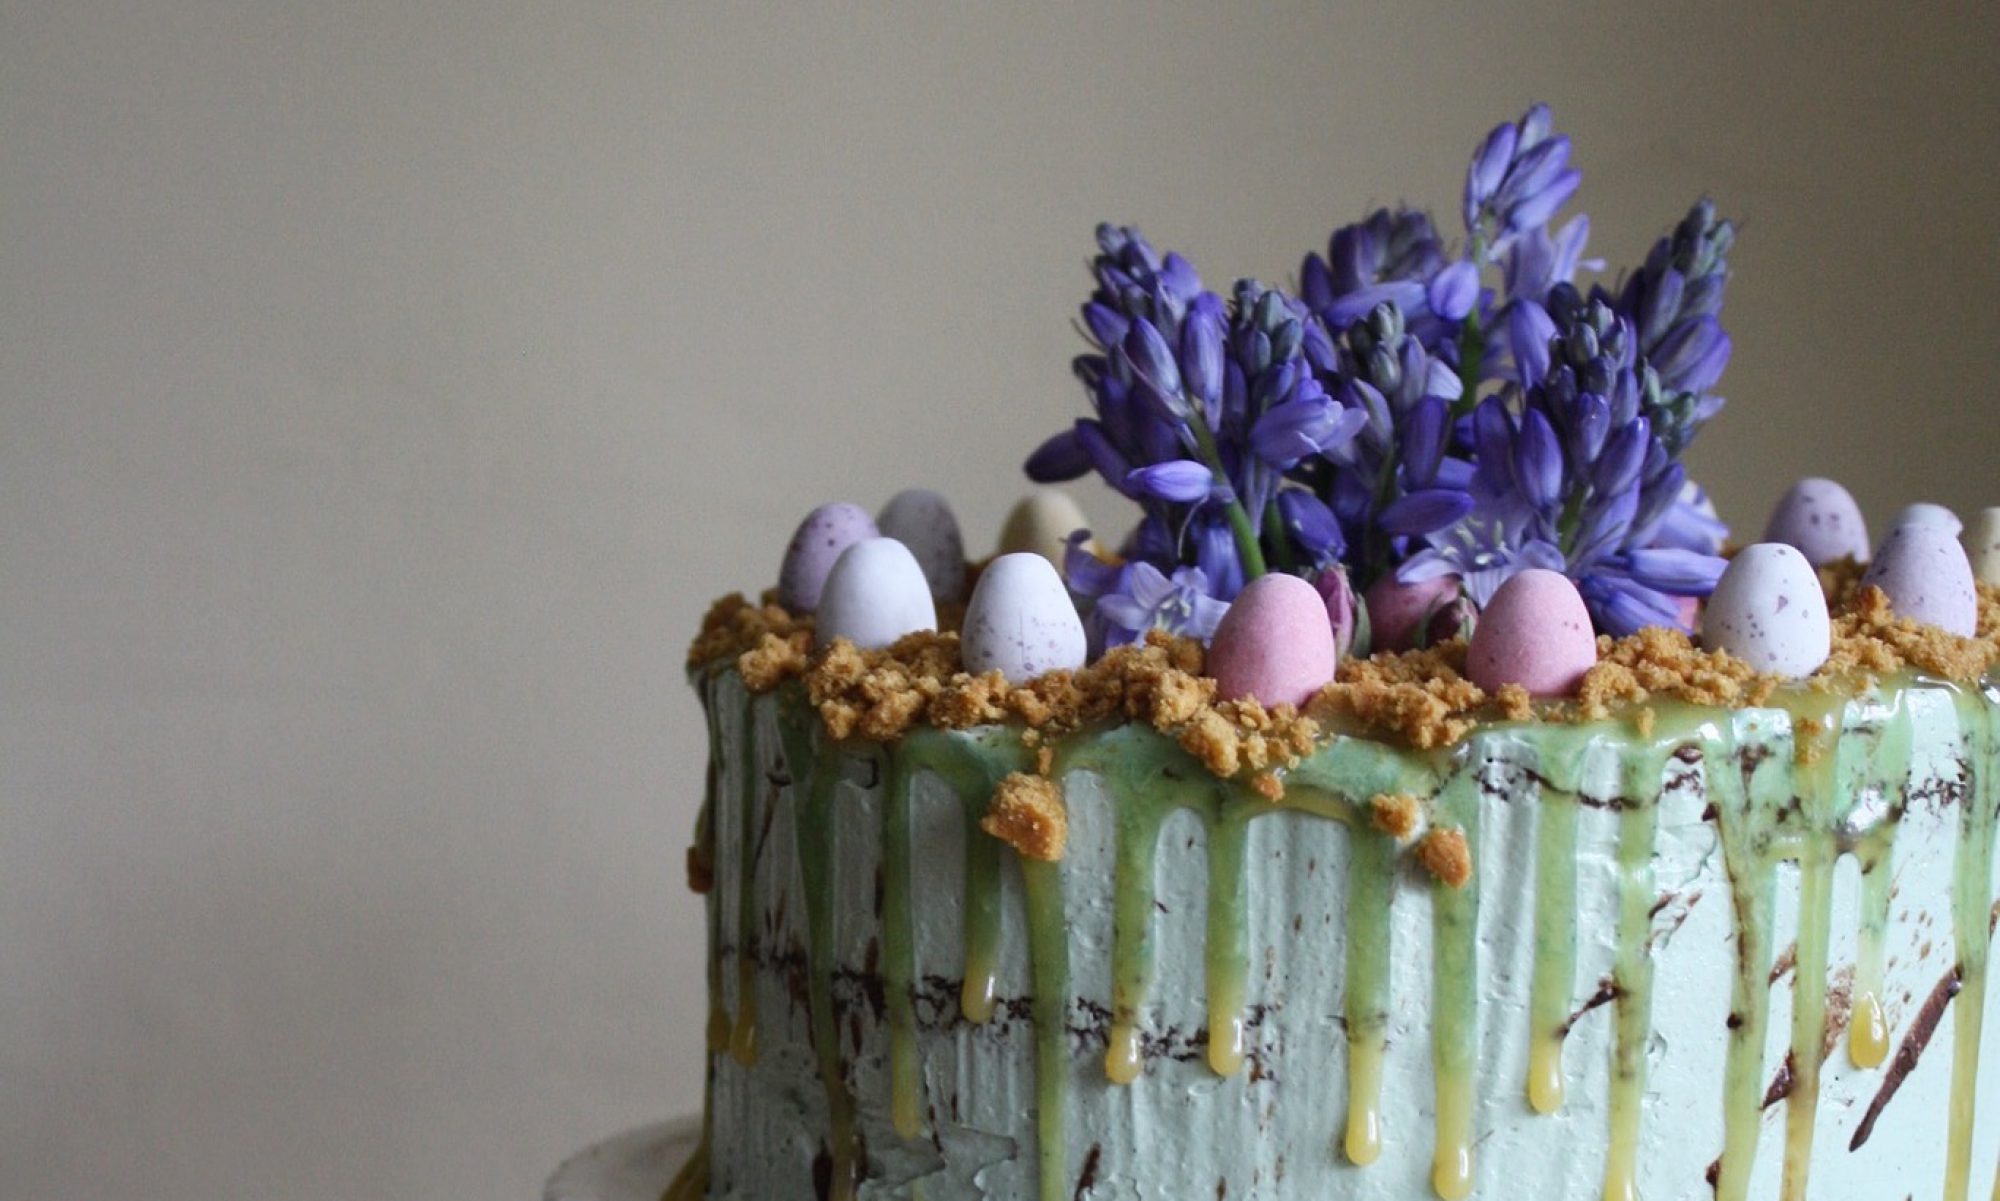
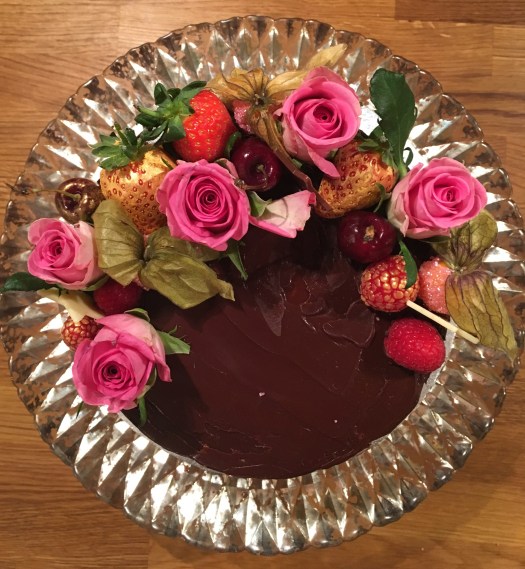
And so, in what follows is a complete – all secrets exposed – step by step guide to recreating one of my signature bakes: A vanilla sponge cake with a chocolate and raspberry buttercream and a raspberry sauce centre, finished with a chocolate ganache flowers a fruit. Perfect for all occasions!
Please note the following recipe is divided into the cake recipe, the icing recipe, the raspberry sauce recipe, the ganache and finally instructions to assemble!
If you want to have a browse of my other cakes, head on over to ‘My Cakes’ page, or follow me on the Insta 😉
Makes enough to serve 15 happily.
Warning: This is a time-consuming recipe and I normally complete it over two evenings.
INGREDIENTS
325g Self-Raising Flour
325g Butter (plus extra for greasing)
325g Light Brown Sugar
6 Eggs
2 tbsp of Vanilla Bean Paste
1 tsp of Coffee Dissolved in 75ml of Warm Water
1 tbsp of Plain Yogurt
1 Pinch of Salt.
METHOD
Begin by greasing three 20cm cake tins and pre heating your oven to 180°C. If you don’t have 3 cake tins, grease two and you can always reuse one!
Firstly beat the butter and sugar together until light, fluffy and smooth in appearance using an electric whisk. For this recipe, I use light brown sugar as I think it gives the cake a richer and more caramelly flavour.

Once combined, add the eggs one at a time and whisking on a high speed after each addition. After you’ve added the last egg, add in one tbsp of flour – this will stop the batter from curdling.

Next, sieve in the flour and salt and beat well. Once fully mixed together, add the yoghurt and vanilla bean paste. I know this paste is considerably more expensive than the extract, I promise you it will be worth it.
After all the ingredients have been combined and you are left with a smooth batter, spoon into the three greased cake tins. Each tin should have around 500g of batter.

Bake for about 25 minutes at 180°C – or until a knife comes out clean!
Remove from tins and let cool using a wire rack.
*Please note that this recipe is taken from The Hummingbird Bakery‘s ‘The Hummingbird’ Cookbook. I have slightly adapted it to suit this recipe by swapping out their addition of milk for 200g of raspberries. This gives the icing enough moisture to loosen it, whilst giving it a slightly sharp and refreshing zing!
INGREDIENTS
450g Icing Sugar
150g Butter – at room temperature
60g Cocoa powder
200g Raspberries
METHOD
Begin by beating your butter in a freestanding electric mixer on a fast speed for about five minutes – or until pale in colour. This is a very important step to making any buttercream frosting and will ensure the end result is both smooth and light in texture.
Next, combine your icing sugar and cocoa powder together loosely. Whilst the whisking all the time, add your one tablespoon of this mixture at a time. You may indeed have to use a spatula and scrape down the sides occasionally to ensure that all the butter is combined. Once it has all been added you should be left with a mixture whose texture resembles dry soil! Don’t panic – this is exactly what you are looking for!

Once this has been achieved, again on a high speed, gradually add in the raspberries. The balloon whisk fitting will break these down to ensure that they combine well. Once all added, leave your mixer whisking for a further minute.
INGREDIENTS
200g Raspberries
200ml Water
4 tbsp Caster Sugar
1 tsp Vanilla Extract
METHOD
In a heavy bottomed saucepan, combine all the ingredients and bring to the boil. once boiling, let the mixture simmer and reduce for a further 10 minutes or until it has thickened and easily coats the back of a spoon.
Remove this from the heat and pass through a sieve using a spatula to separate the jam and the pips. Let cool and voila!
INGREDIENTS
200g Good Quality Dark Chocolate
150ml Double Cream – chilled
1 tbsp Butter
METHOD
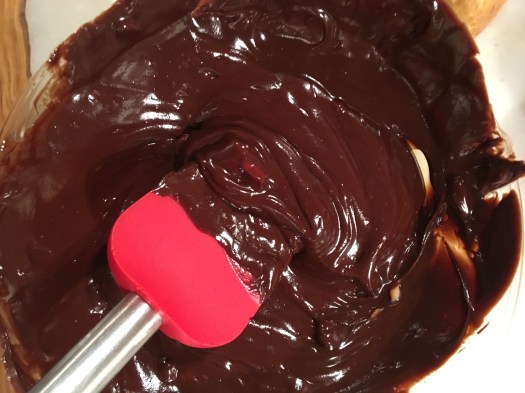
Melt your chocolate either using a bain-marie or in the microwave via 30-second intervals. Once melted add your cream and give the ganache a stir.

Next, add the butter to give it a lovely sheen. It should be thick and spreadable in texture.
Once the sponges have cooled, it is important to level your cakes. This ensures that your final cake will be straight. To do this, simply take a bread knife and carefully slice off the tops of your sponges where they dome.

Next, using a palette knife and spatula, sandwich the cakes together with a dollop of icing and drizzle of raspberry sauce.

Once sandwiched, ice the sides; take a spatula and again dollop all around the sides – especially in the joints of the layers. Then, using a palette knife vertically, go around the edges of the cake until smooth. You may need to add more icing in patches. Also, ice the top in a thin layer. As this is just the crumb coat it doesn’t have to be perfect! (For a tutorial on how to do this, watch this video from HowCast.)
After you are happy you have iced your cake and it’s a smooth and level as possible, place the cake in the fridge for a couple of hours – or overnight. This will allow your icing to firm up so that when you apply the ganache it won’t melt and enable you to get the best finish possible!
Add the ganache by pouring on the top and allowing to slide down the sides. When sliding, using your knife in the same way you did the icing, smooth the sides and top.
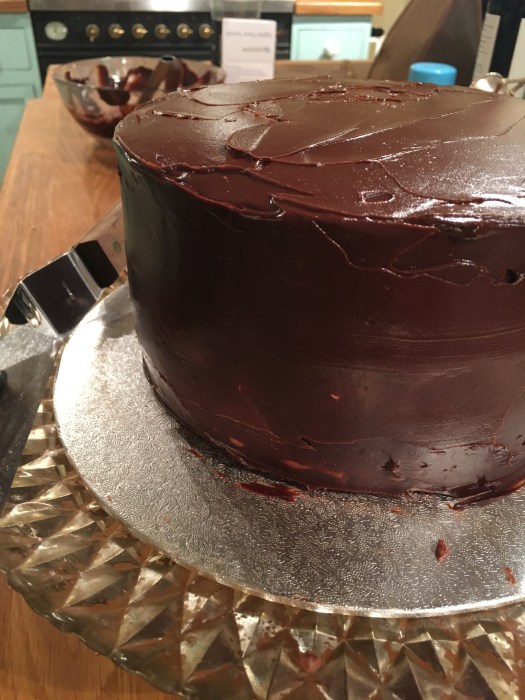
Before placing back in the fridge add your decorations. I think seasonal berries, some coloured gold using powdered gold food colouring, and flowers are the most effective. But get creative and use what you like.
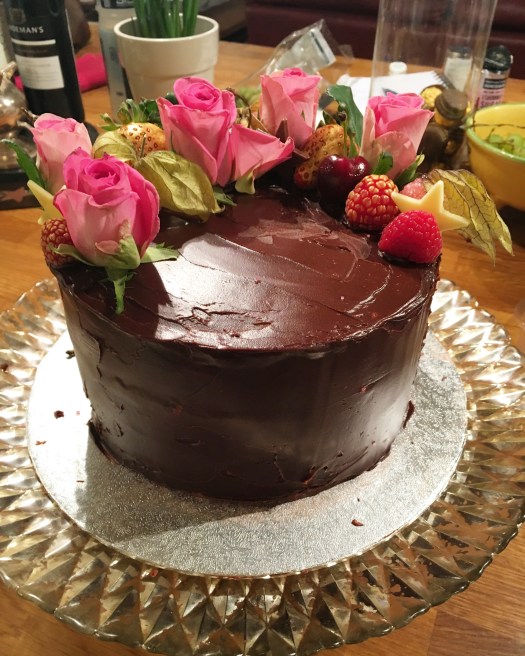
It is at this stage that you are able to truly create your own distinctive style, which in the very competitive world of cakes is crucial! It’s like art, you want people to spot one of your cakes a mile off!
So there you have it, your very own step-by-step guide on how to make your own showstopper layer cake. I’d love to see your interpretations of this recipe, tweet me your cakes at @alittletasty123 or tag me in them on Instagram @alittletasty
All there’s left to say is happy baking!
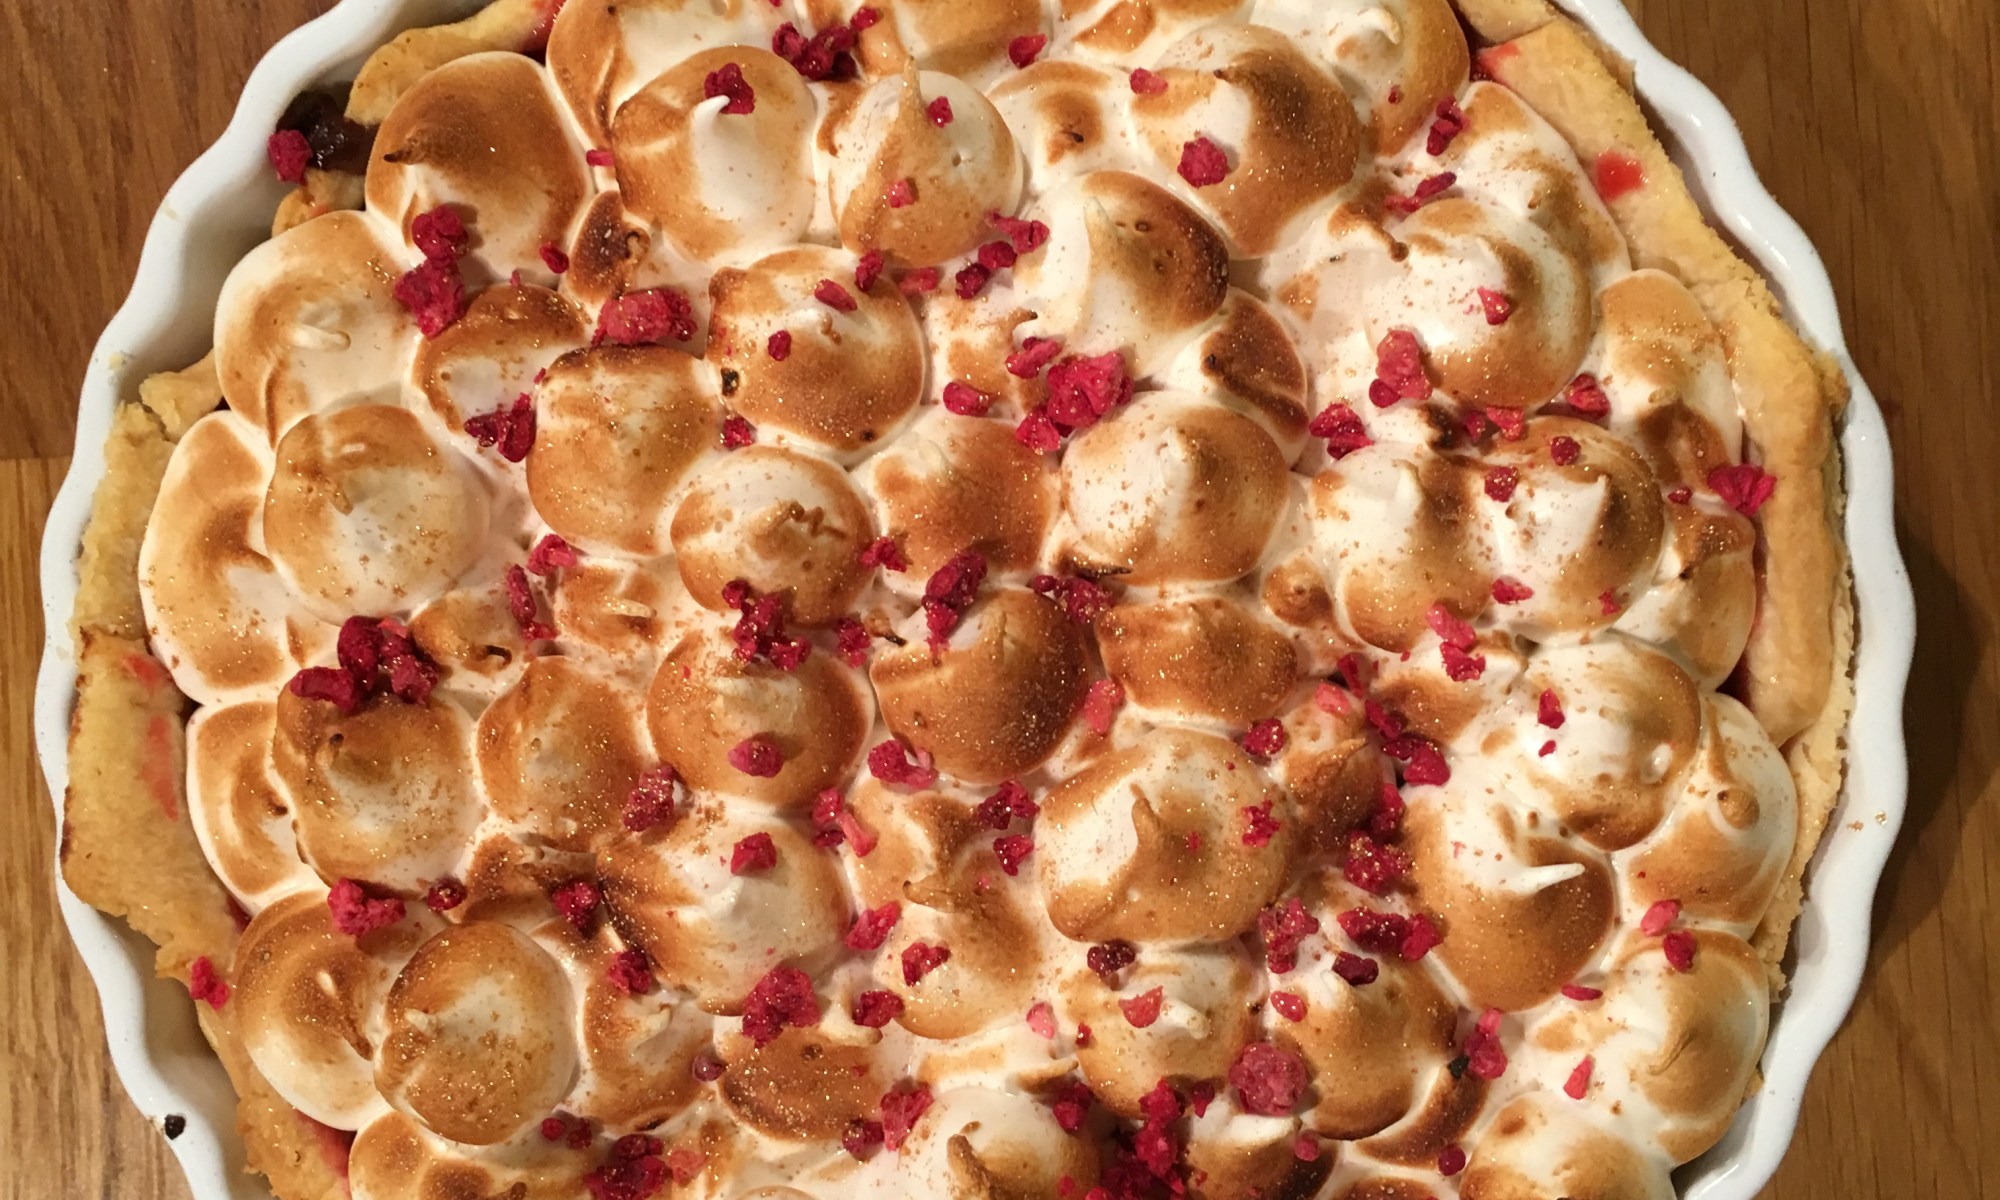
They say when life gives you lemons make lemonade! And in my opinion, when life gives you January make lemon meringue pie! Continue reading “Lemon and Raspberry Meringue Pie”

It was over 2000 years ago that the first (hot) chocolate was believed to have been enjoyed by the Aztecs, and by 1400AD it was a beverage firmly cemented in their culture. Jump forward 600 years and the drink is prolific:
Hot Chocolate is one of those things that is a true classic; timeless, effortless and completely loved by all. It’s a rare trait to find in a drink; one that can and is enjoyed by all ages, types of person and importantly at all hours of the day and night!
This, however, is not to say that every single hot chocolate is the same. On the contrary, hot chocolate comes in as many sizes, flavours, strengths and textures as the individuals do that drink it.
Consequently, I have spent the last few weeks trialling – and not so much erring – to come up with 4 slightly different hot chocolate recipes for you to try this festive season.
Drink responsibly!

First things first, to make any hot chocolate taste amazing, what you need is the perfect base. for mine see the recipe below. Although this is intended as a base for the ensuing recipes to build upon, it makes a perfectly delicious hot chocolate in its own right!
INGREDIENTS
(Makes enough for 2 large hot chocs)
100G Dark Chocolate – chopped – plus extra for topping
800 ml Whole Milk
1 Cinnamon Stick
1 tbsp Muscovado Sugar
1 Vanilla Pod – 1tsp Vanilla Extract will do as a substitute
Whipped cream
METHOD
Warm the milk gently on a low heat in a heavy-based saucepan. Once warm to the touch add the cinnamon stick, vanilla and sugar and whisk.
Next, slowly add the chopped chocolate and whisk until all melted and incorporated into the milk. Leave on the heat to simmer for 2-3 minutes. Let cool slightly and serve with a topping of whipped cream and shaving of dark chocolate.

I know it sounds mad to attempt this recipe after admitting I, unfortunately, have an utter distaste for chilli chocolate. However, ever since seeing the film Chocolat I have had a distinct hankering to try a real homemade chilli hot chocolate. If you haven’t seen it then stop reading this and watch it now! (then, of course, come back!) This is because there is one particular scene in the film when a lady is given an incredibly silky looking dark chocolate chilli drink, and every since then I’ve been hooked on the idea. Following, once embarking on my hot chocolate adventures it seemed the best place to start!
I will warn you, whilst testing this recipe I did meet a few errors with regard to the amount of chilli. I know 1/4 of a teaspoon doesn’t sound like much pepper to be adding, but it certainly is enough. You don’t want this to blow your head off, but something a little warming – especially with the rum in there too – serves as the perfect post-Christmas walk warmer!
INGREDIENTS
1 Batch of base Hot Chocolate – see above!
1/4 tsp of Cayenne Pepper – trust me this will be enough!!
1tsp Mixed Spice
1tsp Grated Nutmeg
1 Splash of Spiced Rum – 2 if you’re feeling festive!
METHOD
Simply, add the above ingredients to your batch mixture whilst still on the heat, stir through and voila!

Now, this may sound crazy, but a pinch of sea salt really can elevate your winter warmer to lofty new heights. Although this was my more experimental recipe, for those that love the synchronised sweet and salted taste experiences then this is for you: The salt cleverly balances the sweetness and bitterness from the dark chocolate in a simply marvellous way. This is furthered by a luxurious topping of whipped chocolate cream…like the sound of this then read on!
INGREDIENTS
1 Batch of base Hot Chocolate – see above!
1tsp of Sea Salt or Pink Himalayan Salt
1tsp Cocoa Powder
1tsp of Vanilla Extract
100ml Double Cream
METHOD
Simply whip the cream with the vanilla, cocoa powder and 3/4 of the salt until it’s a light and fluffy consistency. Then to your batch mixture, top with a generous dollop of this cream and lightly sprinkle with the remaining salt and voila!

Now I know what they say, you shouldn’t have favourites. However, often in life, this proves to be easier said than done and unfortunately this is one such moment and so forgive me for saving the best until last! If like me you prefer your hot chocolate slightly on the bitter side, this is the one for you.
With a subtle aromatic almost herby flavour, this particular recipe is a sure fire knock-out – if I do say so myself!
In the same way as before, all you will need to do is add in the extra ingredients to your batch hot chocolate whilst its still on the heat. However, with this one, it to important to take extra care when serving that people are not given the cardamom pods themselves.
INGREDIENTS
1 Batch of base Hot Chocolate – see above!
3 Medium Cardamom Pods – crushed
1/2 tsp Nutmeg
For the topping:
To your simple whipped cream – made with 100ml of double cream – add 2 tbsp of Irish Cream for a festive twist!
METHOD
Simply add the above ingredients to your batch mixture whilst still on the heat, stir through. add your topping and voila!
So there you have it, 4 easy peasy lemon squeezy ways to jazz up everyone’s favourite winter drink this festive period. Another tip, if you’re looking for a slightly more adult topping – add a splash of rum or Irish cream to your normal whipped cream topping! It really packs that extra punch – perfect if you’re coming in from the cold!

With November marking the final month of the Globe Artichoke’s seasonality, I thought it only right to celebrate this mysterious yet fantastic vegetable with one of my favorite, yet perfectly simple recipes. Continue reading “Adieu To the Artichoke For Another Year: Recipe”

As the nights seem to have already completely drawn in and temperatures are plummeting by the day, I know I am not only speaking for myself when I say that the hunt is well and truly on to find those warmth sustaining recipes to see us through till spring.
Luckily for those still on the hunt, this is one such recipe.
I’ll be honest, up until very recently I was under the firm impression that a munchkin, was the name for a small jolly fellow living somewhere over the rainbow. It appears I’d be mistaken for believing that this is the sole meaning of the word. In fact, it turns out, a munchkin is also the term for a little pumpkin. I wasn’t that wrong then, both being small jolly fellows and all that!
Anyway, back to the food, this recipe drew inspiration from bonfire night where that post-halloween pumpkin soup and hot dogs seem to be a universally agreed menu at every November 5th Firework party. This got me thinking as being a self-confessed pig I am by my very nature terrible at choosing between foods, and instead much prefer ‘and’ to ‘or.’ In the same way, on bonfire night I can never make my mind up, soup or dogs, dogs or soup? But should I really have to choose?
Well my friends, no longer! I have seamlessly combined the two to make a cockle-warming, nose-clearing and dam right filling soup. Simple and tasty this works perfectly in all situations; firework displays, dinner parties, winter walks, those snuffly bed bound days and it even serves as the ideal partner to brighten any grim Monday desk lunch!
So here it for all to use – I’d love to hear your feedback on it, either here or on Twitter or Instagram.
INGREDIENTS
1 butternut squash – cored, peeled and chopped into squares
1 Munchkin – – cored, peeled and chopped into squares
1 Red pepper
1 red onion
1 tbsp olive oil
2 tbsp ground cumin
1 tsp dried sage
3 tsp of crushed chillies
4 garlic cloves, crushed
1.2 litres (2 pints) stock (either chicken or vegetable)
150ml double cream
Salt and black pepper
150g good-quality smoked chorizo
METHOD
Firstly Preheat your oven to 180°C. One you have peeled and deseeded the munchkin and squash and chopped both into rough chunks place them in a roasting dish. Next deseed and slice up the pepper and place this in too. Drizzle the tray in olive oil, a sprinkling of salt and pepper and add the sage and half the cumin. Cover with tin foil and place in the oven to roast for around 40 minutes or until soft.
Next, chop and fry the chorizo in a heavy based sauce pan. Once beginning to crisp, peel and chop the onion and garlic and add to the pan. After the onion has softened add the roasted squash, munchkin and pepper. To this, add the chillies and remaining cumin. Once combined, pour in the stock, and simmer for 25 minutes.
Once this time is up, blend the soup until smooth using a stick blender, then add in the cream and taste for seasoning.
When you are ready to serve the soup, sprinkle on roasted munchkin seeds that have been tossed in cumin and if you have any remaining chorizo, fry it off into little lardons – these make the perfect garnish!

I Scream, You Scream, We All Scream for Ice Cream!

With the UK having undergone a heat wave this week I seem to have dedicated my lunchtimes – not so accidentally – to becoming an ice cream connoisseur and tasting pretty much all the ices that Winchester has to offer.
